I have lots to write about and will post all about Summer soon but for now I'm jumping straight into Christmas! Well not actually but Christmas Sewing and getting prepared.
Festive Friends by Dashwood Studio (dashwoodstudio.com) designed by Aless Baylis is a cute cheerful advent calendar that can be made and used year after year.
It comes as a panel with instructions on it, (in blue) It's available on my website youmeandmabel.co.uk with lots of gorgeous co-coordinating fabric too!
The instructions written remind me a little of a technical challenge on The Great British Bake Off! They are there but if you have not made one before or have limited sewing knowledge you might struggle with it a little!
I have included lots of photos to help along the way. The photos aren't the greatest as when I made the calendar it was a dark grey rainy day so lighting wasn't the best and I'm not a processional photographer.
Okay lets get going.
Grab a cuppa and a biscuit, remember to enjoy sewing and it doesn't have to be perfect so have fun with it.
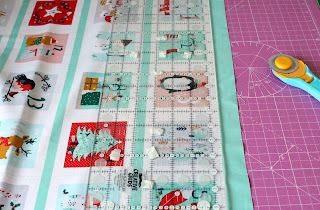
1, Cut out the back panel following the outer of the green seam allowance.
I gave the panel a press to start with and then used my rotary cutter so I got nice straight edges, scissors are fine if you don't own a cutter.
2, Cut out the pocket strips around the outer edge of the cream seam allowance.
Again I used my rotary cutter but scissors are fine if you do not have a rotary cutter.
3, Press over the seam allowance on the top edge of each pocket strip and stitch.
It doesn't give a seam allowance so it's up to you. I double folded my hem so there was no rough ends and then stitched a very narrow seam allowance.
4, Make a box pleat between each pocket by bringing the sides together to meet the dotted line.
I folded one edge first, pressed it and then did the second edge, pressed again and then I popped a pin in at the top of each pocket to keep the pleat in place.
Pin each pocket stops it from moving.
5, Press and tack the side and bottom seam allowances on each pocket strip.
Now I was very good and did tack, I was tempted to just leave pins in place but I was good and tacked all the strips, and I'm pleased I did as it made sewing it so much easier and stopped any major movement.
6, Pin each pocket strip to the back panel and tack in place.
I tacked down the middle of each pleat where the dotted line is and then down the two side ends and along the bottom. It took a while but it does make life easier in the end. I always use a thread that shows up so I can see the tack stitches.
7, Stitch the pocket strips onto the back panel.
To do this I first stitched down the dotted lines in between the pleats. I started at the top of each one and went backwards and forwards several times just at the top as I wanted to add some strength as the pockets will be getting lots of use! Once they are stitched I then started at top of the edge of either left or right pocket strip (it doesn't matter which) and stitched all the way down one side along the bottom and then back up the other edge of pocket strip.I took my time and made sure all my pleats lay flat so as I stitched over the bottom the pleats stayed in place.
8, Layer the panel with wadding to give some body and choose a co-ordinating Christmass pattern to back the panel with. Quilt the panel as desired.
Firstly I pressed the pocket strips then removed all my tacking stitches. I used a fat quarter 55cm x 50cm to back my panel with. Placing the Fat Quarter right side face down then the wadding and the advent calendar on top face up. I put a few pins in place to stop it moving, but you can use spray or tacking stitches.
I started in the middle and stitched around on the white, I decided as Phoebe my Pfaff has pretty stitches, to use a star stitch. Once all the middle was stitched I then went all around the green border.
I decide red festive friends snowflake fabric would be perfect for the binding.
I decided on 2 1/2 inch binding was wide enough. To join the binding together, place one strip face up then the other strip face down as photo.
Draw a diagonal line across the top and mark it. I used a friction pen which will disappear with heat. Stitch on the line and trim away the excess.
Fold the binding in half with wrong sides together and press.
Place the binding with raw edge of binding against the raw edge of calendar. Start sewing half way down. Leaving a good few inches of binding at the start.
When you get to a corner stop. Then fold the binding up and then back over again. See photo below.
Once you get to the last edge near to where you started stop. Leaving a few inches unsewn. Trim off any extra binding so the binding overlaps by two inches. Fold the bottom binding over diagonally so its at 45 degree angle. Pop a pin in place to stop it moving and then place the top binding over it and stitch in place. If you have a different way of binding then please do it your way.
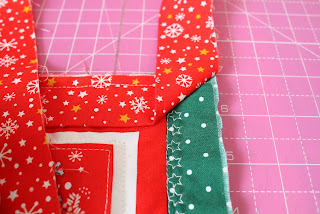
Once the binding is all stitched, fold the binding over on to the back of the calendar and hand stitch into place. This is my favourite part of sewing. It's gentle and slow and a good chance to sit and watch some TV knowing your project is nearly finished!
9, Make loops or a sleeve along the edge of the panel to hang the finished calendar.
I decided to just sew two little loops on the back using some striped ribbon from my stash.
Try not to fill with treats just yet until the 30th of November as if you are like me you will only eat them!!!


